10 in 10 guest post {the sisters behind eighteen25}
 Well I am back on mainland US soil…trying to help my kids and myself recover from jetlag. I am excited to share with you another guest post. For those of you that check in here regularly for easy diy projects – you are going to be big fans of today’s post. Last month I had the opportunity to guest post over at eighteen25. It is a blog full of crafty goodness, tons of scrapbooking ideas and free downloads. The sisters – Jennifer, Jamie, & Jodie – are crazy creative. They also have a knack for compiling all kinds of ideas from talented bloggers. Today’s post will get you ready for Christmas and you get a super cute free download to help with the process. Enjoy their blog and their post here today!

For the past three years, us girls have gotten together to make Christmas Planners. It’s always fun (and a little frustrating) to design it inside and out. But, it’s even more fun to use it during the holiday season.
We’ve come up with a Christmas Planner download to help you get yours done in a snap.
In TEN easy steps, to be exact.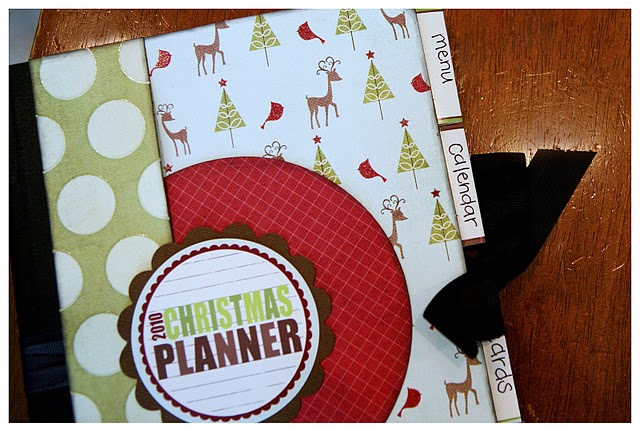
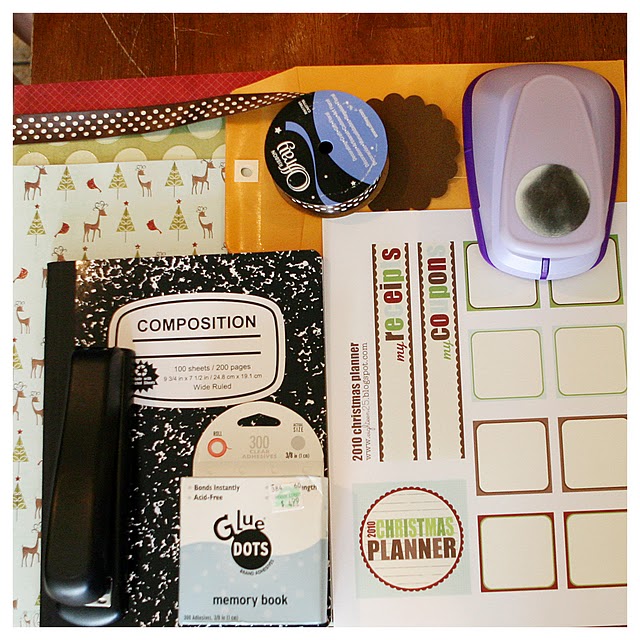
STEP ONE: Download 10xmasplanner and print it out.

- composition notebook
- ribbon (we picked black grosgrain)
- 3 sheets of 12×12 pattern paper (we used My Mind’s Eye – I Believe papers)
- adhesive (glue dots work best)
- 3″ circle punch (to punch out Christmas Planner tag)
- a 4″ scallop circle cut from a Cricut (optional)
- 2 6″x9″ envelopes with clasps
- stapler
- black ink pad (optional)
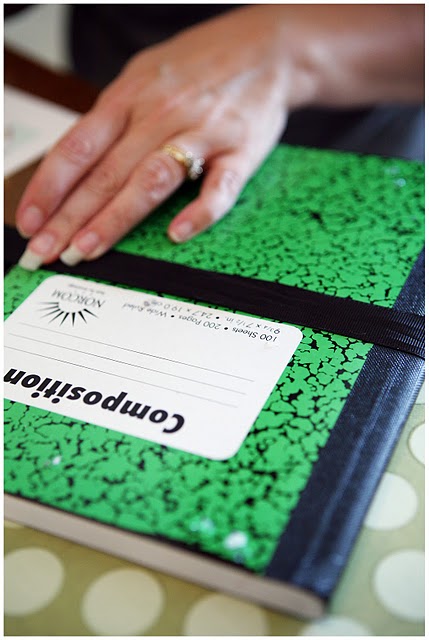
STEP THREE: Cut a piece of ribbon about 36″ long and attach around your notebook with adhesive. Now you’ll be able to tie it shut so little curious eyes won’t be able to peek at your Christmas list.
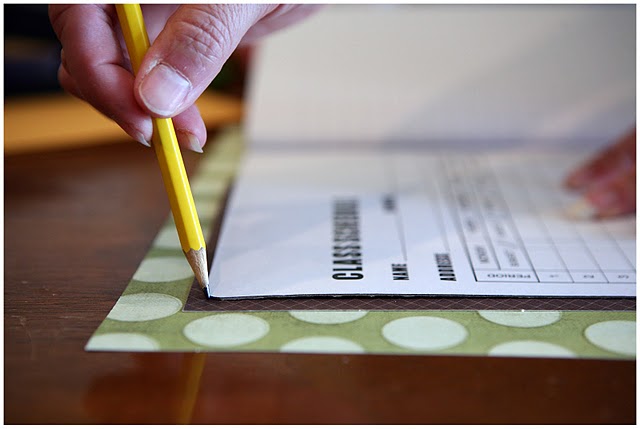
STEP FOUR: Cut one sheet of paper in half so that you have two 6″x12″ pieces. Lay each piece under the front and back cover and trace so you know how long to cut for the length and corners. All composition notebooks are a little different. If you’d like, ink the edges of your paper to give it a distressed look.
STEP FIVE: Using another sheet of paper, cut two 2″ strips and then trace on your notebook to get the length. Ink the edges.

STEP SIX: Cut a 5 1/2″ circle out of your last sheet of paper. You can ink the edges of that too.

STEP SEVEN: Now we’re going to glue everything down. First, start with the two larger sheets. Then your large circle (you should be able to line it up with the black spine of the notebook. Next, adhere your two strips. Again, lining it up with the black spine. And last, but not least… attach your Christmas Planner tag.

STEP EIGHT: Get your envelopes and your two strips that say “my receipts” and “my coupons” ready. Find two scraps of your pattern paper and cut two strips 2″x6″. And go ahead and ink the edges. Attach these to the bottom of your envelopes and then attach the strips with the sayings at the bottom of that. Glue these down to the inside of your front flap and the inside of your back flap. Now, you’ll never misplace those important little pieces of paper. (NOTE: we backed the inside flaps with white sheets of cardstock to cover up all of the printed words that we don’t need to see.)
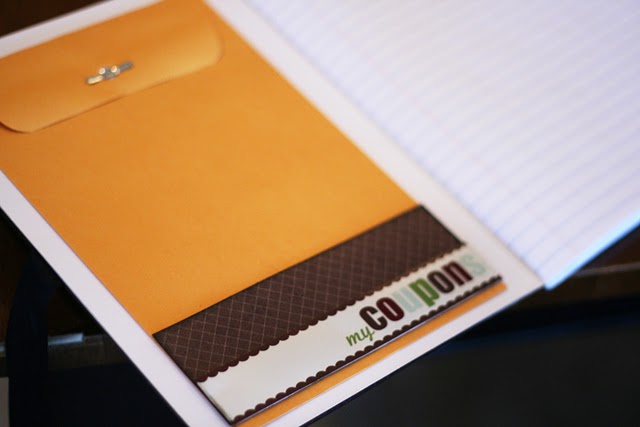
STEP NINE: Find a calendar online and print it out. We used the weekly calendar from calendarlabs.com. You’ll adhere these sheets right on the notebook pages behind your calendar tab. What calendar tab? That’s the next step. 🙂

STEP TEN: You can use the tabs provided on the download, or make your own by cutting 2″x2″ squares out of your remaining paper. Ink the edges and then fold them in half. Now, you’ll want to give each tab a title. Our tabs include… THE LIST (where we write down all of those wonderful gift ideas), CALENDAR (where we attach the calendar print outs and jot down important dates), CARDS (where we keep address of everyone we need to mail Christmas cards too), MENU (where our Christmas dinner menu goes and our grocery list too), TO DO (where we write down all of the extra little things we need to remember, but are too frazzled to) Choose whatever works best for you. Gather a few notebook pages and staple your tabs on. Layering them down the side, so they’re easy to read.

And you’re done!!
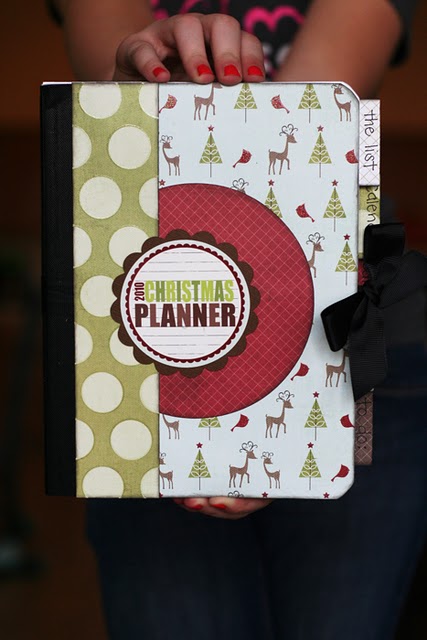
Make sure this little puppy tags along with you on every shopping trip. It’s a must!
What an honor to be a guest here at Under The Sycamore. Thank you for having us Ashley!
Jennifer, Jamie and Jodie

I have more pictures from our trip than any of you would ever care to see…nonetheless I will begin the photo onslaught tomorrow! By the way, I just saw an ad for a pumpkin patch…10 days on an island…I have zero desire to go to the pumpkin patch this year. Sad. I know.
