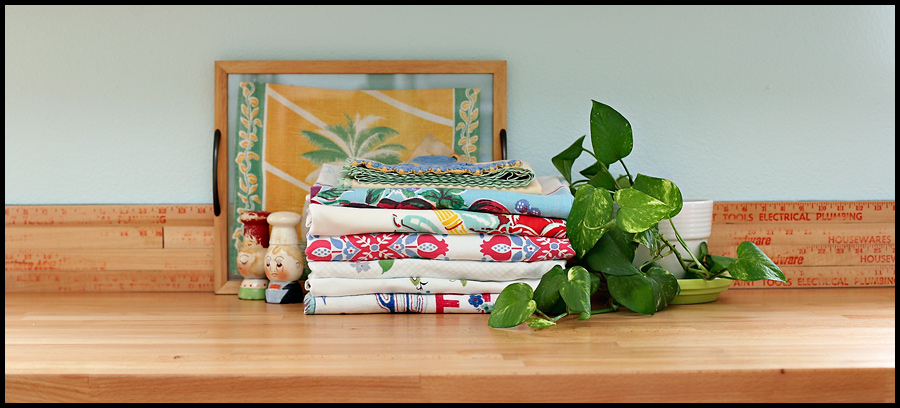
DIY {yardstick backsplash}
Originally posted: 09.14.09
We’re still working on a kitchen remodel. My dad and Chris installed butcher block countertops and left me to figure out a backsplash. I told Chris I wanted something unexpected, he just wanted something. My aunt suggested doing something similar to my fireplace, but with acrylic. Chris suggested white subway tile. I ventured to Lowe’s to price check everything. The acyrlic was more than I wanted to spend, so I headed to the tile section. The tile, too, was more than I wanted to spend. So, I decided to walk the aisles of Lowe’s until I came up with something. I was in the tool section and saw some metal yardsticks…which reminded me of a picture in Pottery Barn kids a while back that had beadboard made of vintage yardsticks. I knew I could do something similar and thus my backsplash was decided upon. You can imagine Chris’ response when I said I was going to glue yardsticks to the wall 🙂 He’s pretty supportive of my randomness…makes for a good marriage!
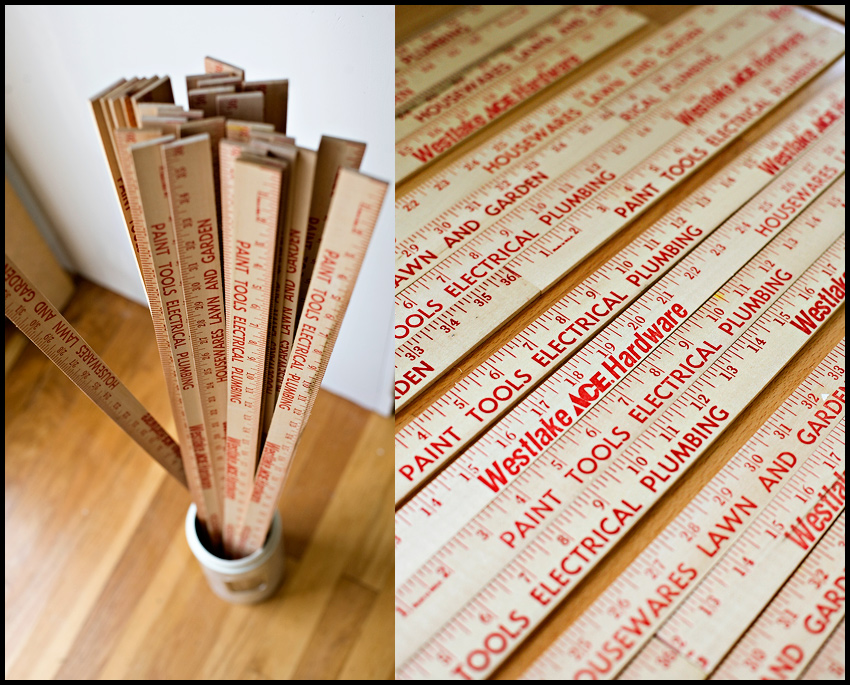
Step 1: Buy yardsticks from Ace Hardware (Lowe’s didn’t have the wood variety)
Step 2: Mix up and cut to the size
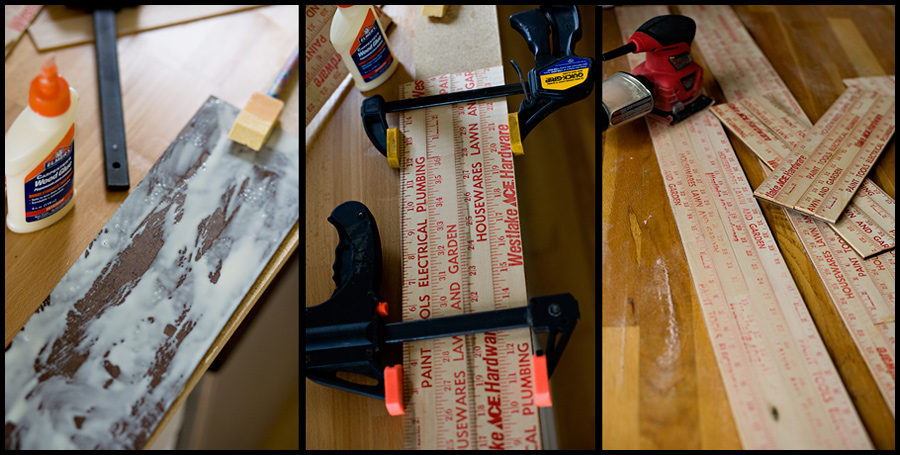
Step 3: Cut hardboard the length of the cabinets and height of 4 stacked yardsticks
Step 4: Glue cut yardsticks to cut hardboard, use clamps to hold in place while drying
Step 5: Sand to give impression they are worn and old
Close of up sanded boards and unsanded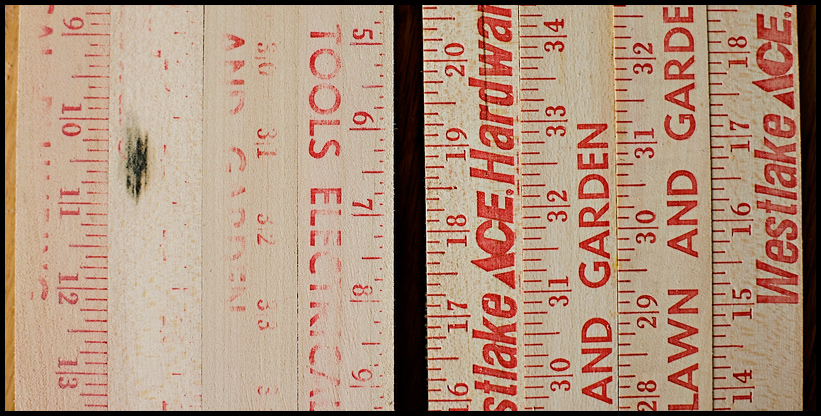
Step 6: Make sure everything fits right
I share this picture to show that I goofed up on my measuring. My main board was about 4 inches too short, so I had to create another smaller piece to add on. I share this b/c some of you have the false assumption that I get projects right the first time. I don’t. Case in point.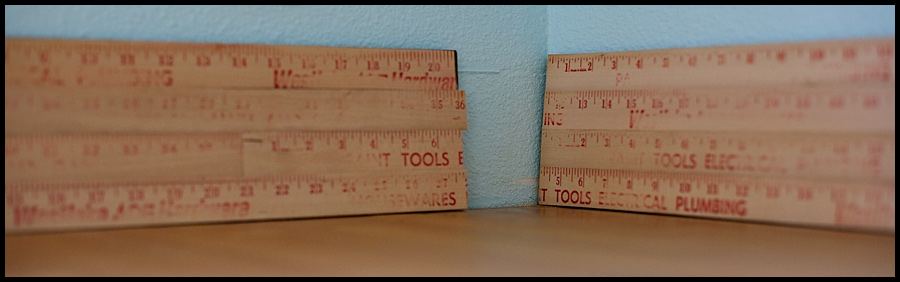
Step 7: Seal boards with at least 4 coats of Polycrylic
Step 8: Attach to wall using Liquid Nails…clamp to wall while drying
Step 9: Use clear silicone caulk to seal the tops, bottoms and sides…make it waterproof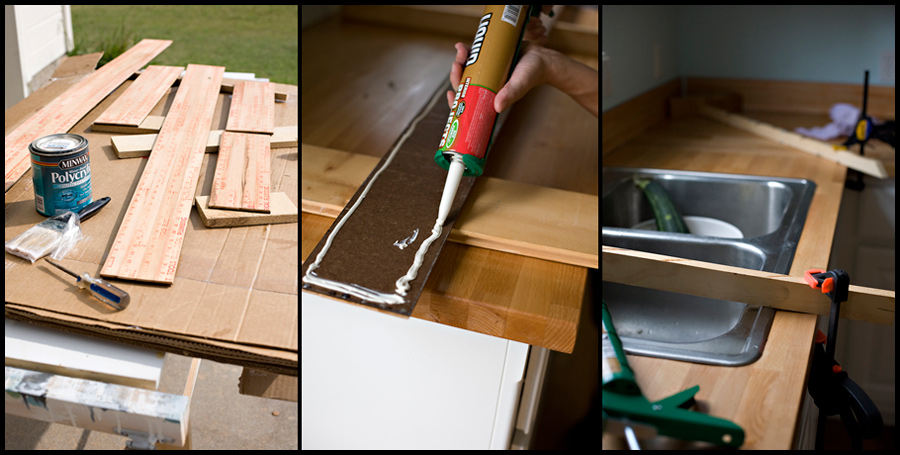
Before & After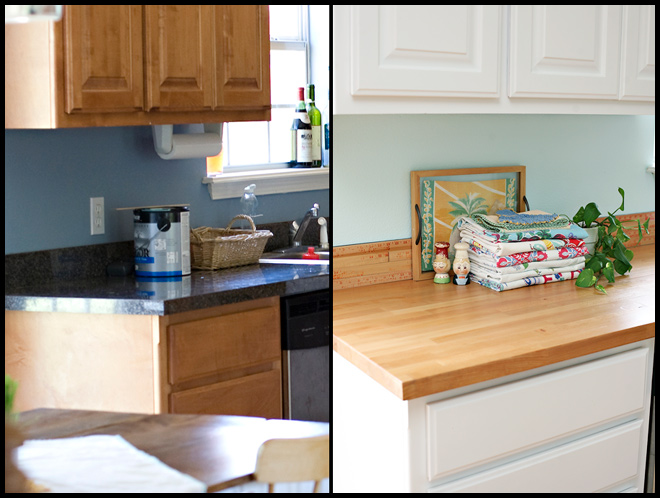
Now I know some of you looking at this are thinking the “before” picture is better than the “after”. Granted a yardstick backsplash isn’t for everyone – which is why it is so fun to visit homes. How boring would this world be if we all had the same tastes and interests! I’ll share more from the kitchen when it is finished…